Configuring a Virtual Python Programming Environment on EC2 Running Ubuntu

Today I’ll run through the following steps to create a virtual environment for coding in Python:
1) Create user & download credentials
2) Create Ubuntu 20.04 Ec2 instance
3) Connect & log into the instance
4) Refresh updates & upgrade packages
5) Create directory & create Python environment
6) Activate & confirm the virtual environment
7) Create a program called hello.py
Create User & Download Credentials
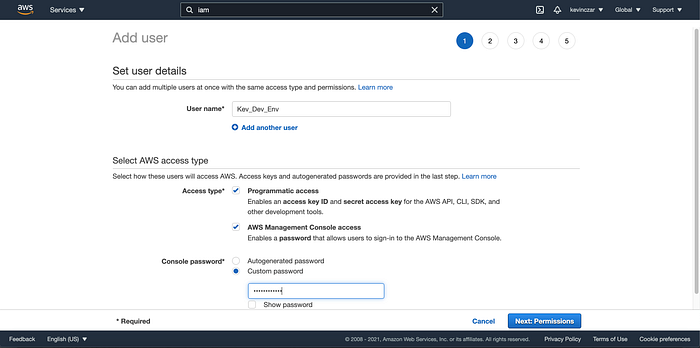
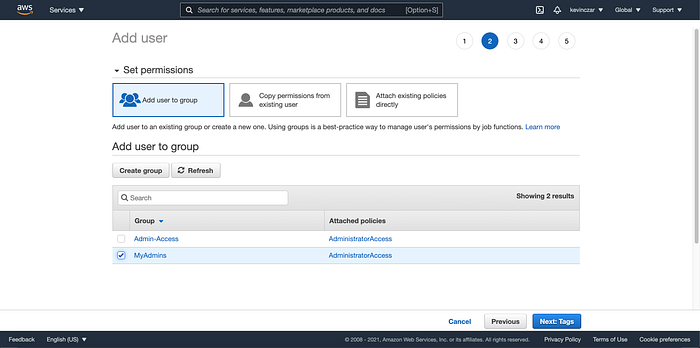
First I added a new user in IAM, gave the new user programmatic privileges, and made them an admin by placing them in the Admin group (Image 1 & 2). No tags were needed for the purpose of this exercise.
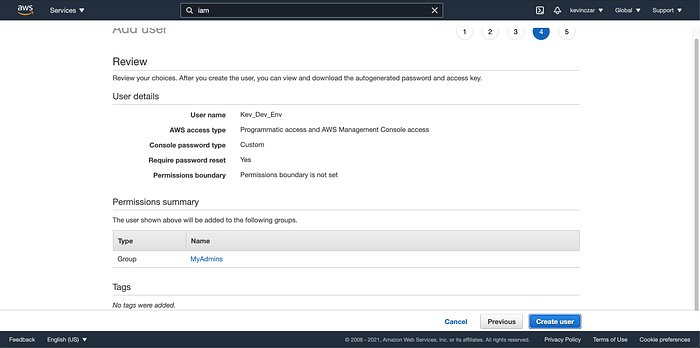
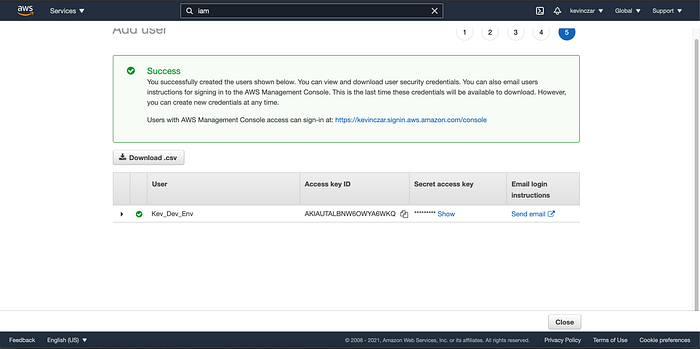
I reviewed the new user prior to creation, then clicked Create User (Image 3). Image 4 shows confirmation of new user creation, and I noted down the Access Key & Security Access Key as they will be needed later in this exercise.
If you don’t have the AWS CLI downloaded on your machine, you’ll need it. You can get it here. Also you can refer to this article I wrote to auto scale through the CLI, where we go through the same process in order to command AWS through the CLI.
Create Ubuntu 20.04 EC2 Instance
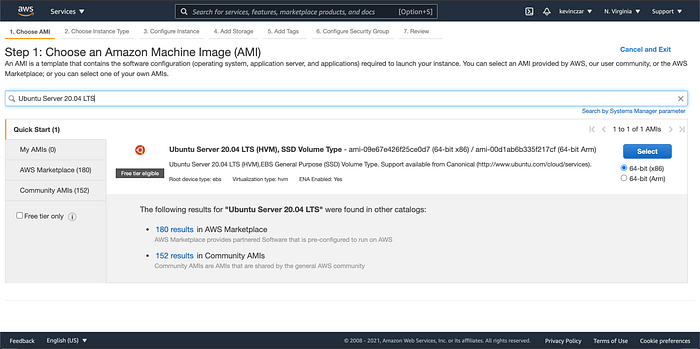
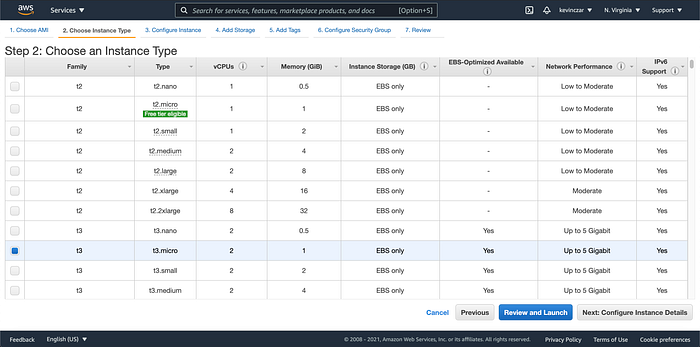
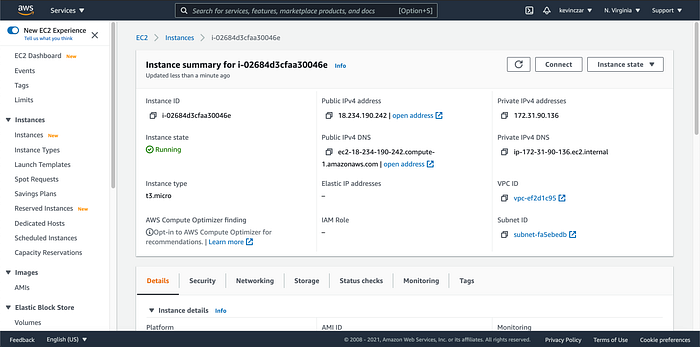
I then went to the EC2 Dashboard and created an Ubuntu instance by searching “Ubuntu Server 20.04 LTS” (Image 5). I chose t.3 micro (Image 6), and confirmed that it was running (Image 7). Note, the security group must allow us to SSH in from our Terminal.
Connect & Log into Instance
Now that I was ready to connect to the instance, I went to the EC2 Dashboard, selected the instance, and under actions I clicked Connect (Image 8). I then went to SSH Client, and

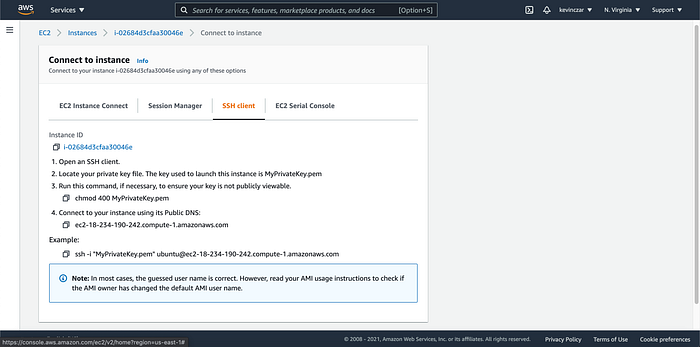
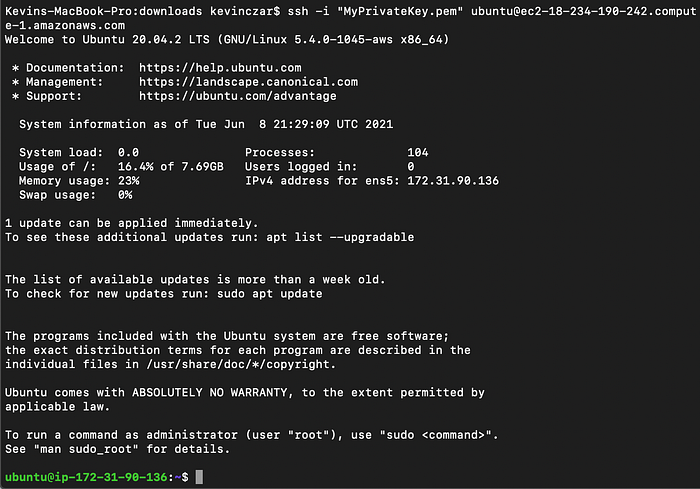
Then in my Terminal I followed instructions 1–4 in Image 9. Image 10 shows the output which indicates successful connection.
Refresh Updates & Upgrade Packages
To update, I ran: sudo apt update. To upgrade, I ran: sudo apt upgrade
This took a couple minutes & the Terminal output printed many, many lines. Image 11 shows the end of the output. I won’t paste all lines because there were so many, and most were updates with details not essential to this exercise.

Create Directory & Create Python Environment
Now that we were connected to the Ubuntu instance & fully updates + upgraded, we created a directory.
We used the command mkdir environment to make the directory named “environment”. Then I changed directory into “environment” using cd environment (Image 12).

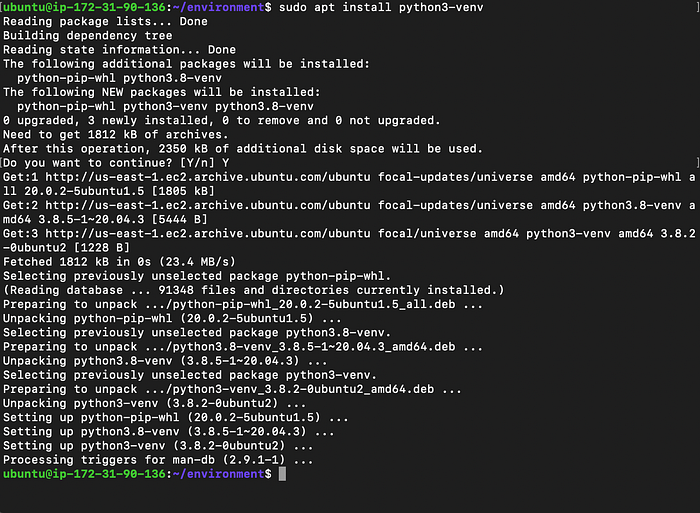
Then I installed the virtual Python environment using venv. The appropriate command was sudo apt install python3-venv as seen in Image 13.
Then I created a path to the directory using python3 -m venv pythonenv (Image 14), where “pythonenv” is what I chose to name the environment.

Activate & Confirm the Virtual Environment
I then ran the command source pythonenv/bin/activate as seen in Image 15. We can confirm that the activation of the environment was successful because “pythonenv” is in brackets on the far left of the line following activation.

Create a Program Called helloworld.py
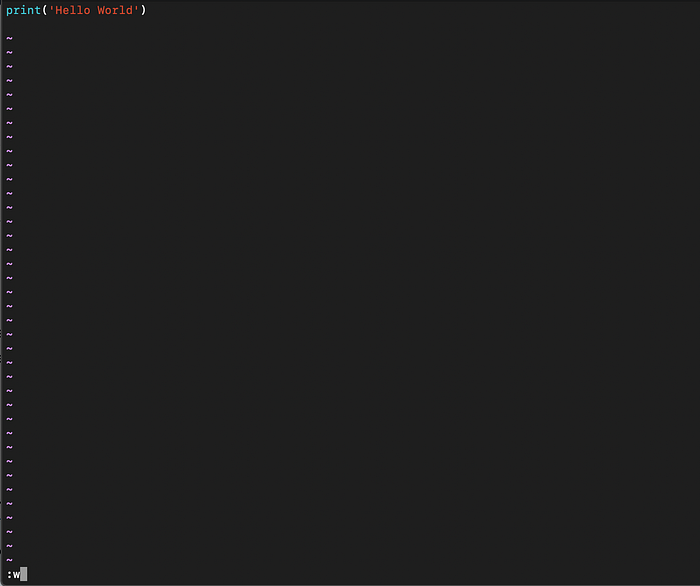
I then used the command sudo vim helloworld.py to edit text and include “Hello World.” You can use your text editor of choice — it doesn’t have to be vim. Image 16 shows the text editing in vim, exactly at the point where I am using :w! to save the text.
I then ran the program using the command python3 helloworld.py as seen in Image 17 where “Hello World” successfully printed.

Thanks for reading — more content to come soon.
