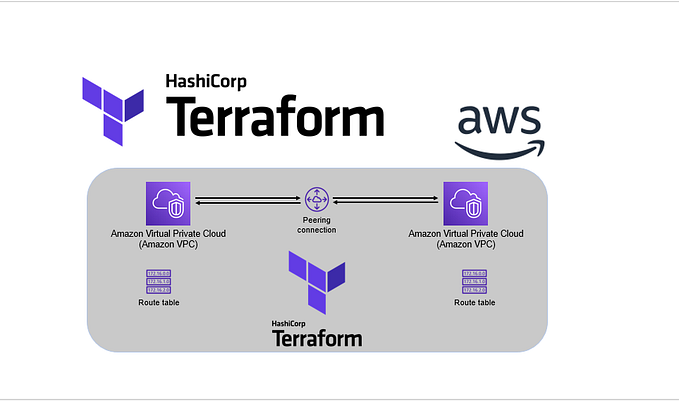
Using Terraform to Deploy a Three-Tier AWS Architecture

Terraform is an open-source infrastructure as code tool made by HashiCorp, who’s logo is in the banner of this article. With Terraform, you can control infrastructure in a straight-forward, human-readable code called HCL (HashiCorp Configuration Language). HCL will be commonly used throughout this exercise. It’s worth knowing, HCL is declarative code, meaning unlike imperative code which requires developers to explicitly list steps to accomplish a result, developers using HCL are only required to described their desired results to execute the code.
In this exercise, I used Terraform to setup a VPC, subnets, RDS MySQL, and a load balancer. I followed Terraform’s workflow: Write → Plan → Apply
For this exercise, I needed:
- AWS Command Line Interface (AWS CLI)
- Terraform, which can be downloaded here
- Text Editor — with Terraform plug-in
Since I’ve already installed Terraform with Homebrew, I wanted to confirm it was on my machine and check the version, so I used the command terraform --version as seen in Image 1. Terraform v1.0.0 came out very recently in the time before this post, so at this point we should be good to go.

Part 1: WRITE
I made a directory for our upcoming Terraform source files which are to be main.tf, variables.tf, terraform.tfvars, outputs.tf.
1a: Write main.tf
I opened main.tf in Atom, my text editor of choice right now.
AWS was my provider, so the top of main.tf was as seen in Image 2.

Then I needed to initialize with AWS, so I went to the AWS CLI to run the command terraform init. Note this needs to be done in the directory that I’d just created, which was named “terraform_arch_1.”
As you can see in Image 3, I changed directory to “terraform_arch_1,” then initialized terraform which we can see was successful. In Terraform, when we see green, good. Yellow, we need some changes. Red = not good, error.

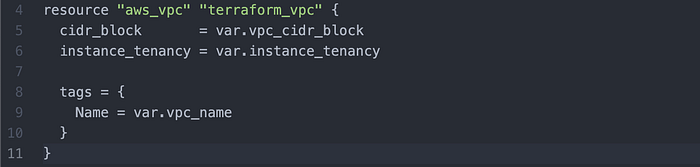
Then I returned to main.tf in Atom to write my VPC (Image 4).
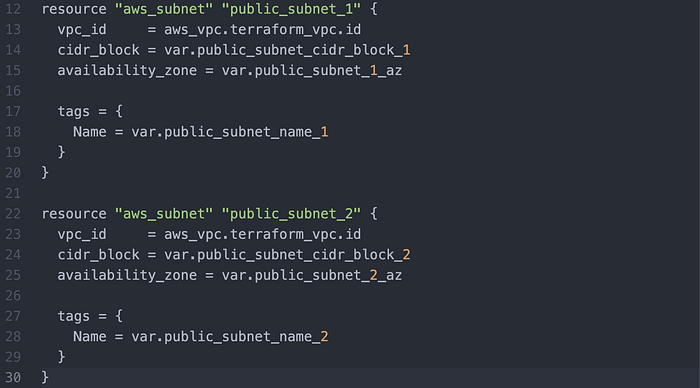
Then I created the public subnets (Image 5). Note that there are two subnets, and each has a respective CIDR block, availability zone, and name.
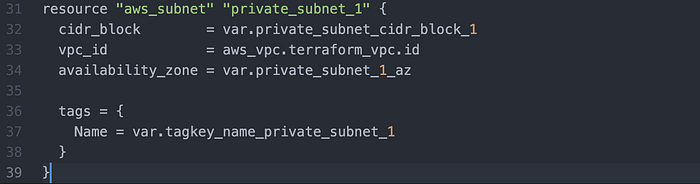
Then I wrote a private subnet (Image 6).
Then I wrote an internet gateway for the subnets (Image 7).

Then I wrote route tables + associations for the respective subnets (Image 8–10).


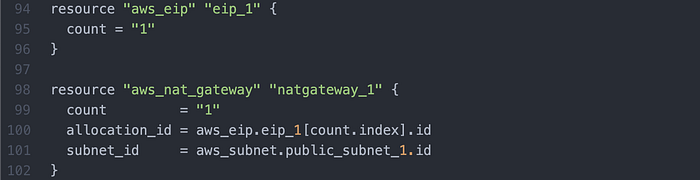
I then wrote an elastic IP address + NAT Gateway (Image 11).
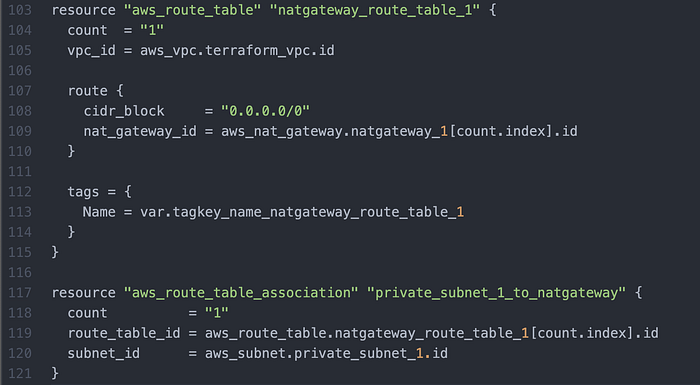
I then wrote a NAT Gateway Route Table (Image 12), associated to the Private Subnet.
I then wrote for AWS to create a new key pair (Image 13).

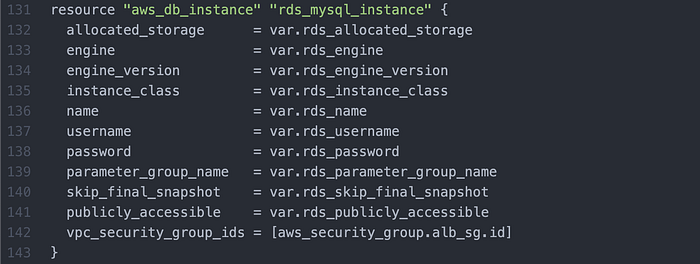
I then wrote an RDS MySQL database (Image 14).
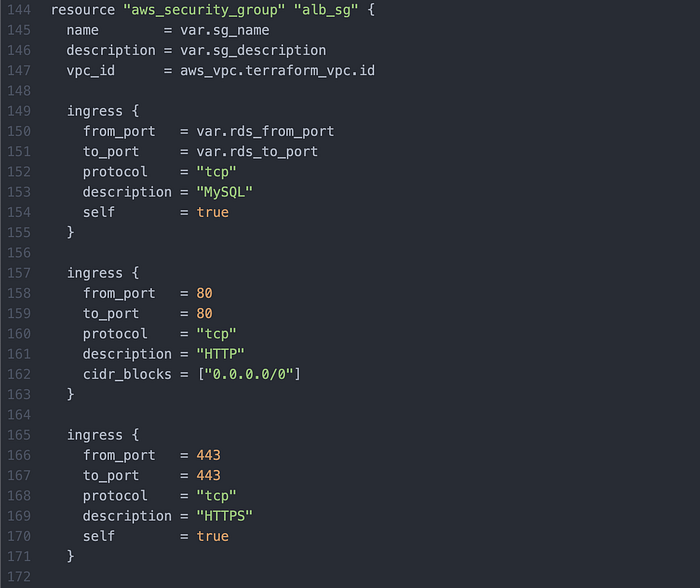
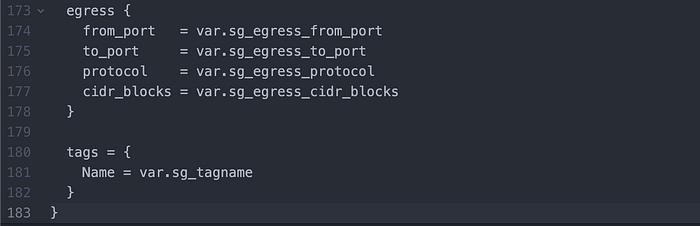
I then wrote my Security Group (Image 15 & 16).
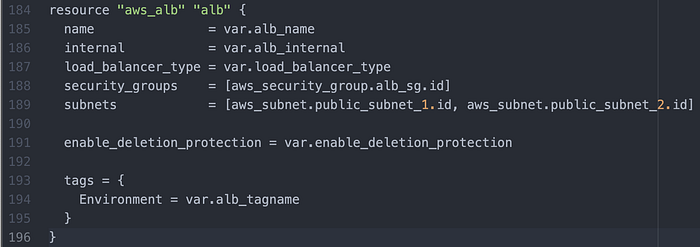
I then wrote the Load Balancer (Image 17).
That concluded the writing of main.tf.
1b: Write variables.tf
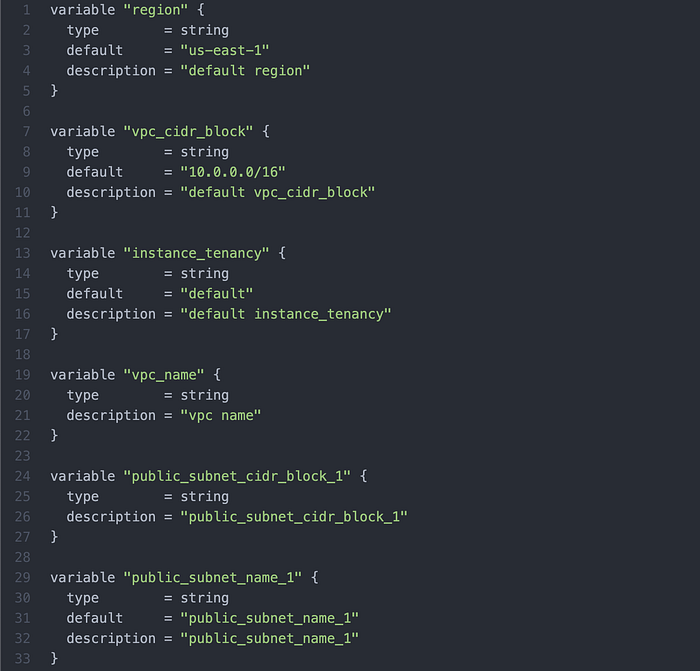
We use variables.tf to have a central place for making changes in HCL Format to main.tf, without having to directly amend main.tf. Image 18 features the first six variables being defines, but for all 292 lines of the source code please visit Paul Zhao’s code, which I will also credit at the end of this article.
Write terraform.tfvars
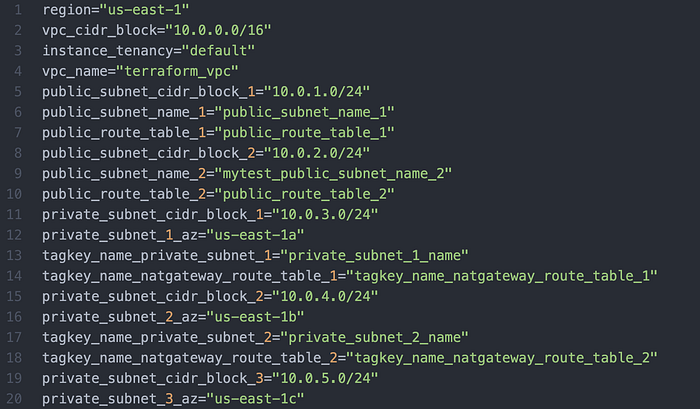
Then, for all the functions from main.tf starting with .var, we wrote a key-value list again in accordance with Paul Zhao’s repo (Image 19).
Write outputs.tf
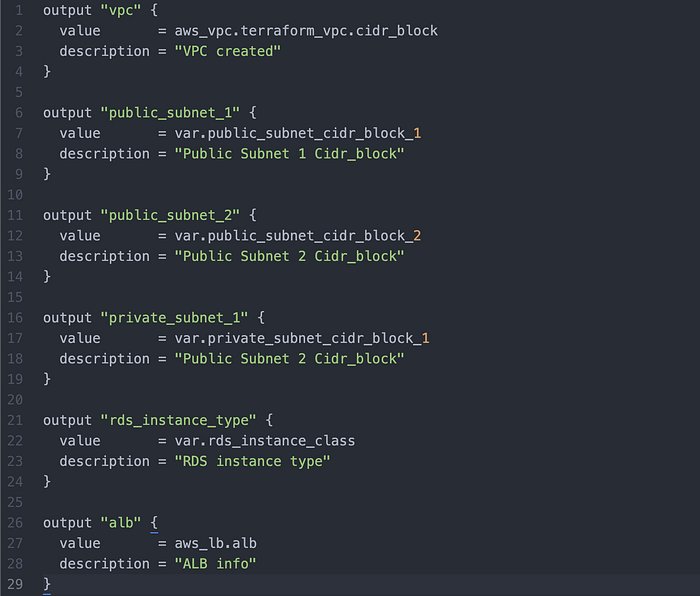
Then, for when we use terraform apply, we write outputs.tf to define what we want returned to us in the case of successful application. Image 20 shows the full code for this.
That concludes Part 1: WRITE.
Part 2: PLAN
Now that we completed our writing, we prep our work for deployment and check that Terraform is happy with the codes syntax + architecture.
First I use the command terraform fmt to ensure proper formatting of the files.
Then I ran terraform validate to ensure validity of my files. Here we ran into a speed bump which was a great learning point. I received four errors (Image 21), all having to do with lacking declarations.

Edit 1: I found in variables.tf that there was a variable defined called “Private_Subnet_2_az”, but it was not listed in the source code in main.tf. I therefore deleted “Private_Subnet_2_az” and replaced it with “public_subnet_1_az”. (Image 22)

Edit 2: Similar to the first edit, I the was a variable unnecessarily defined as
“private_subnet_3_az”, so I replaced it with the necessary “public_subnet_2_az”.(Image 23)

Edit 3: A private route table mistakenly wasn’t declared at all, so I added it to variable.tf after the public route tables. (Image 24)

Edit 4: For the last edit I declared resource alb and re-ran terraform validate, which gave me a successful configuration (Image 25).

Then I ran terraform plan, and in my Terminal a long list of what Terraform would perform was printed.
Now that fmt, validate and plan were successful, we concluded Part 2: PLAN.
Part 3: APPLY
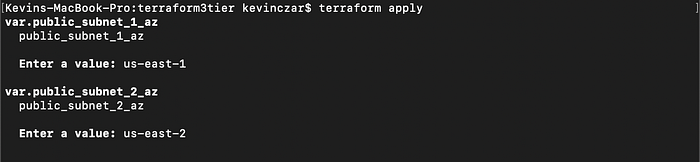
At this point our files were ready to create our AWS environment, so I ran the command terraform apply and Image 26 shows that first I was asked to clarify which AZs I want my subnets in. I wrote us-east-1 and us-east-2 respectively.
Then the long list of tasks Terraform would perform were printed again, and lastly I was asked to confirm that I wanted to execute this environment by typing “yes”. (Image 27).

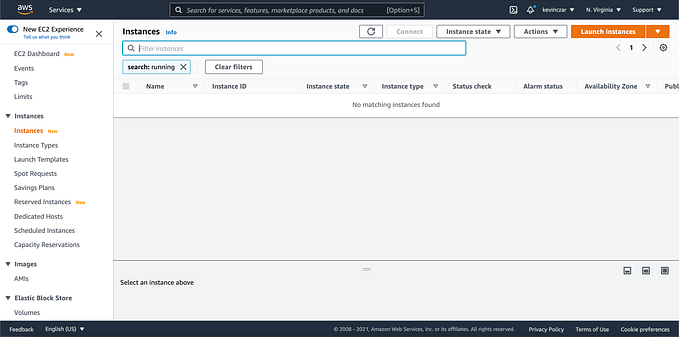
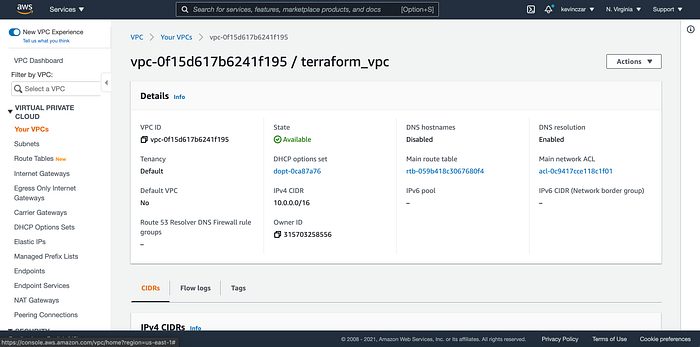
Everything was being created in Terminal (Image 28), and I went to my AWS Console to see that indeed the VPC was made (Image 29). I then went to each respective service and indeed the entire environment was successfully built.

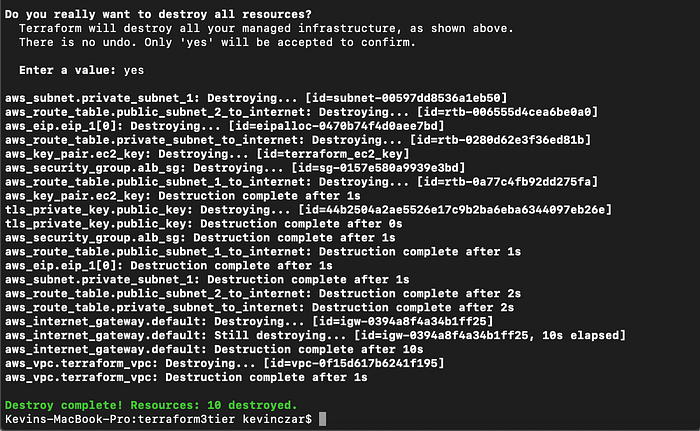
I then ran terraform destroy, so that I could remove the environment and avoid charges to my account. As seen in Image 30, Terraform asked me to confirm that I wanted to destroy by typing “yes,” then after sorting each item in the environment, I received in green a successful destruction.
Thank you for reading.
Note: This was my first complex project with Terraform, so if there are minor discrepancies between the four files, please be aware of my juniority with this tool.
Credit: Along with guidance from my training course at Level Up In Tech, much of this work was derived from Paul Zhao’s Terraform repository on Github. Paul has been a great resource for my development including some of my Python work for which he is also cited.