Creating an Amazon ECS Cluster with a CentOS Image Using Terraform

This exercise centers around Amazon Elastic Container Service (ECS), a service offering managed container orchestration. It integrates with the AWS platform to deploy, manage & scale containerized applications. Also in this exercise we will leverage Terraform Registry, which is a place for providers to offer resource types and modules for quick deployments.
For this exercise, I needed:
- AWS Command Line Interface (AWS CLI)
- Terraform, which can be downloaded here
- Text Editor — I’ll be using Atom.
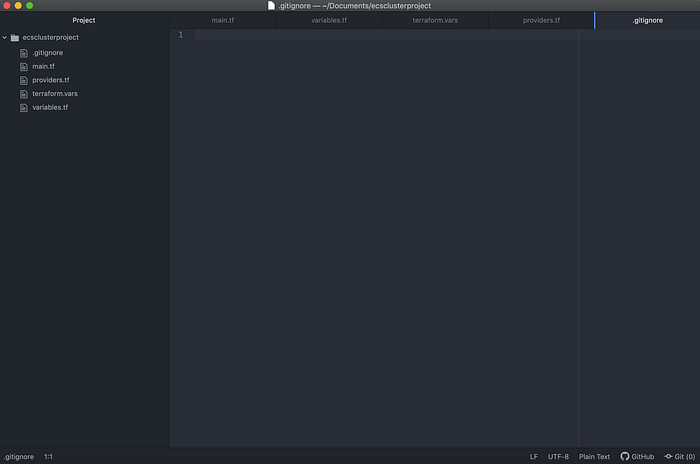
In order to create an Amazon ECS cluster with a CentOS image using Terraform, I first made a new directory for this project called ecsclusterproject, and therein I made five files: main.tf, variables.tf, terraform.vars, providers.tf, .gitignore (Image 1).
main.tf
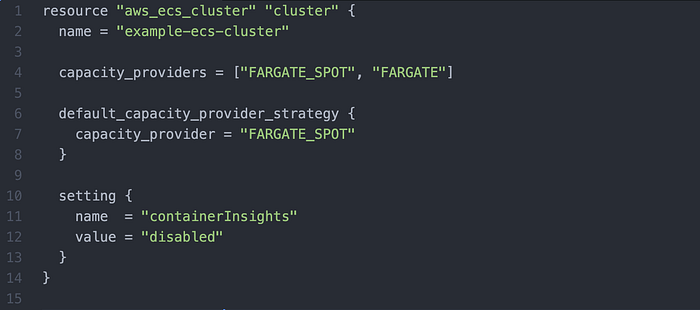
We will now go through each file respectively, starting with main.tf. Image 2 shows the first 15 lines of main.tf, where the resource must be defined as the Amazon ECS cluster.
Then I went to the Terraform Registry (Image 2) and copied the module’s provision instructions into main.tf in order to make AWS ECS Fargate services.
Also consider the Inputs tab (Image 3), which lists the 15 variables in this module that must be defined.
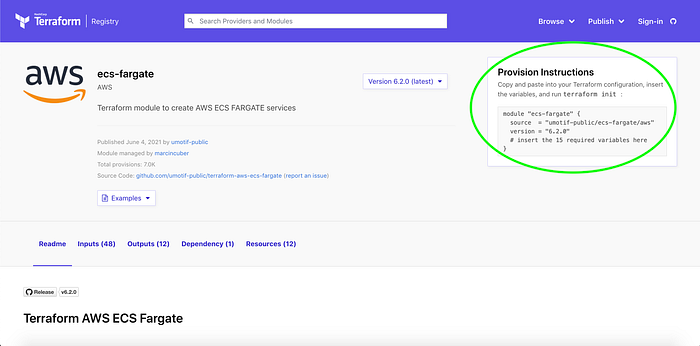
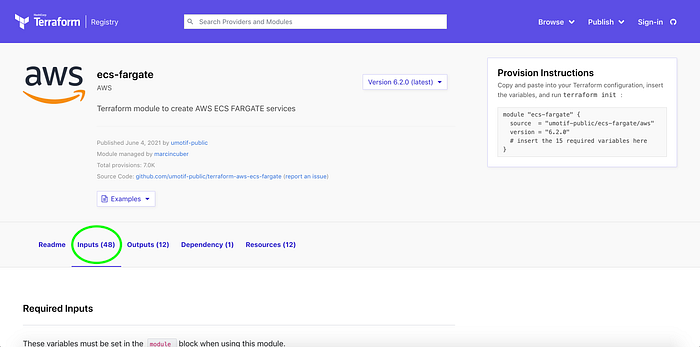
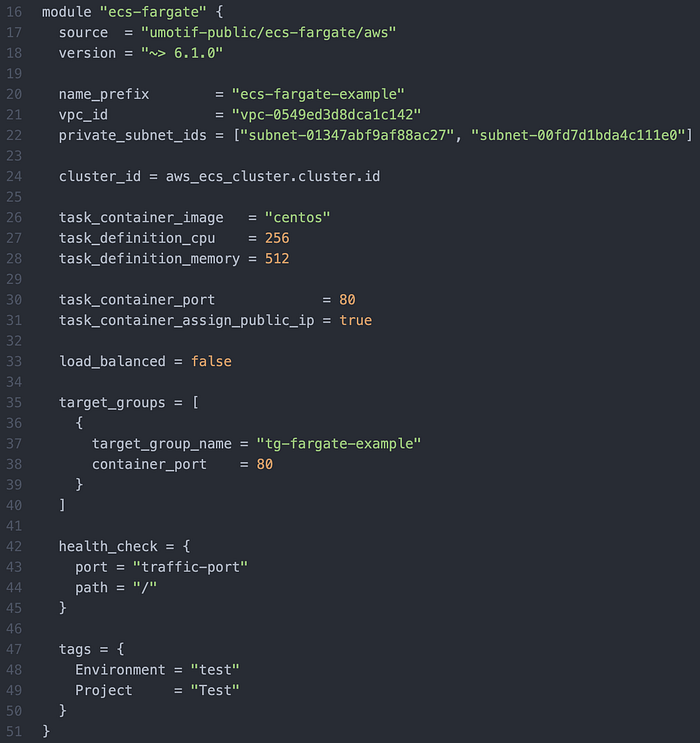
Image 4 shows lines 16–51 of main.tf which holds the module block holding the provision instructions & 15 variables. Some key variables to note are:
- For “vpc_id” & “private_subnet_ids” I populate my unique ID’s. To replicate this exercise you would need to have your own unique ID’s populated.
- “task_container_image” must be “centos” in order to pull the CentOS image we seek.
- I used Port 80 & I assigned a public IP
- For “load_balanced,” we will write false because for this exercise we aren’t load balancing. Typically when we don’t identify a load balancer, Terraform will default to be false. However, it is best practice to still write Line 33 out, so that if in the future we want a load balancer, we can easily edit the variable to be true.
That concluded the writing of main.tf.
variables.tf
I wrote the variables needed: my access key & secret access key (Image 5). Note that sensitive = true so that this sensitive information won’t be printed

That concluded the writing of variables.tf.
terraform.vars
terraform.vars is automatically ignored by .gitignore which we’ll cover shortly in this article. I’ve blocked out my sensative information in Image 6.

That concluded the writing of terraform.vars.
providers.tf
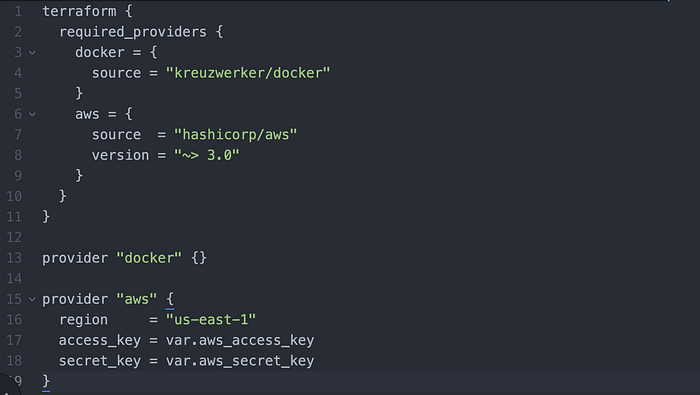
Here we include both Docker and AWS as our providers, and we set both our access and secret keys.
That concluded the writing of providers.tf.
.gitignore
Here we ensure our files aren’t tracked by Git. Also note the file begins with “.” so that the file is hidden.

That concluded the writing of .gitignore.
Provision
Now that the files are written we will provision the infrastructure.
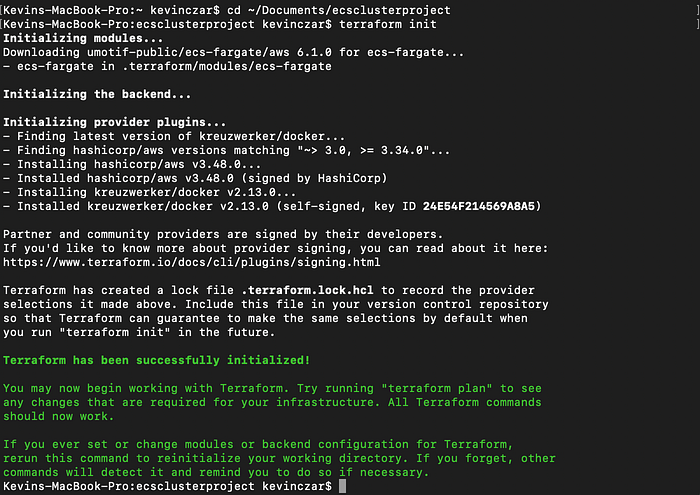
First I changed directory to the project directory, and then I ran the command terraform init to initialize Terraform in our Terminal (Image 9).
I then ran the command terraform fmt to ensure correct formatting of my files. Then I ran the command terraform validate to ensure no syntax errors. Image 10 shows the execution of these commands. Note that terraform validate does proceed to ask for your Access ID, Secret Access ID, and it prints all lines from your files.

I then ran the command terraform plan to ensure the right resources would be provisioned. Image 11 shows the successful end result of the command.

I then ran the command terraform apply to actually create the infrastructure. I typed “yes” when the output asked me to confirm the action. Image 12 shows successful application.

Confirm
I then went to my AWS Console to confirm the resources were provisioned.
Image 13 shows the ECS Cluster was indeed created.
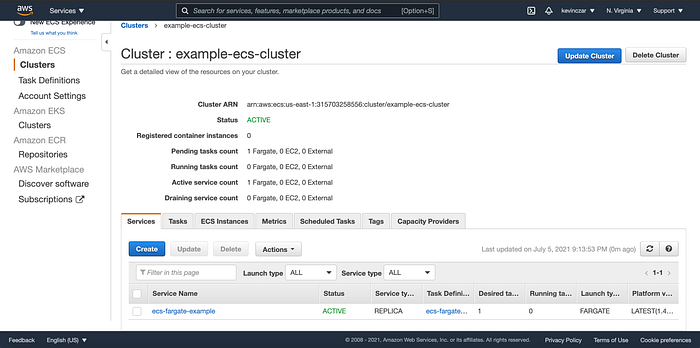
Also the CentOS image was created as seen in the Tasks tab screenshotted in Image 14. Note it was still pending at the time of the screenshot.
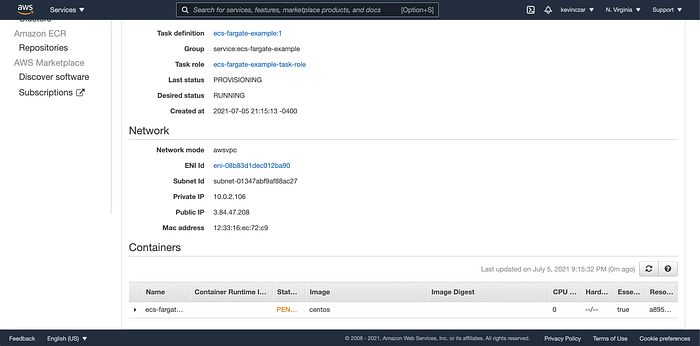
At this point we can conclude that the creation of an ECS Fargate Cluster using Terraform was successful.
Destroy
I then used the command terraform destroy to teardown what was created, which like terraform apply requires the “yes” confirmation. Image 15 shows the successful destruction.

Thanks for reading.
Credit: Troy Ingram’s Github (Terraform repo) was a key resource in executing this exercise.



![AWS Terraform [2024]: ECS Cluster on Autoscaling EC2 with RDS DB - a fully CloudNative approach](https://miro.medium.com/v2/resize:fit:679/1*oFw6CENBoDEFt_Yh4L8NmA.png)

