Enabling Continuous Deployment of a Two-Tier AWS Architecture with GitHub & Terraform Cloud

Continuous Integration / Continuous Development (CI/CD) is the frequent delivery of applications by steamlining & automating development and operations processes. This method is beautifully illustrated as the key solution towards the end of the novel The Phoenix Project, which I summarized in a previous Medium article.
In this exercise we will create a highly available two-tier AWS architecture, and we will deploy this using Terraform Cloud as our CI/CD tool.
For this exercise, I needed:
- Github
- Terraform Cloud
- AWS CLI
- IDE (I used Atom)
- Terraform
Architecture
My objective was to create a highly available infrastructure with three public subnets, three private subnets, an auto scaling group for the bastion host, an auto scaling group for the web server, and an application load balancer targeting the web server auto scaling group. Image 1 diagrams our environment.
A few key details are:
- NAT Gateway: A NAT Gateway was added so that our Web Servers in private subnets could access internet for updates.
- Web Servers: We are putting them in the private subnets so that they cannot be openly accessed by the internet. I therefore added a Bastion Host in an Auto Scaling Group (ASG), and we can SSH into our Web Servers from there. The capacity of the ASG that the Bastion Host is one, so that if it goes down it will be reproduced within the ASG.
- Application Load Balancer: This is internet facing, so that traffic can be directed to our Web Servers. Also the web servers are in an ASG for high availability.

STEP 1: Fork Repository
I first forked necessary files fellow “Level Up In Tech’er” Troy Ingram’s repo. Please note that in this exercise I am focusing on CI/CD, and so if some work on Terraform files & HCL is abbreviated, that is the reason. For more detailed Terraform work you can read these prior articles I’ve written:
- Using Terraform to Deploy a Three-Tier AWS Architecture
- Creating an Amazon ECS Cluster with a CentOS Image Using Terraform
- Building a Custom EC2 Module with an Amazon AMI Using Terraform
Note that for this exercise, I updated my key_name in the root main.tf to my AWS EC2 Key Pair. Also please keep in mind that key pairs are unique to region, so make sure you are in the correct region when running this exercise!
STEP 2: Terraform Cloud
I created an account with Terraform Cloud and then signed in.
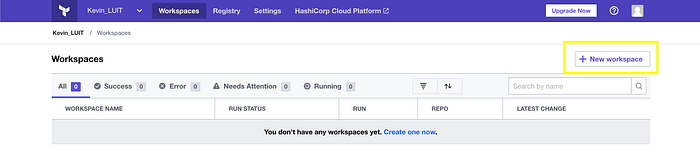
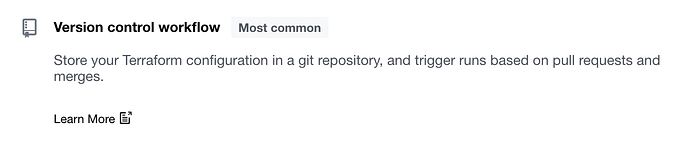
I then created a new workspace (Image 2) using Version Control in Terraform Cloud (Image 3).
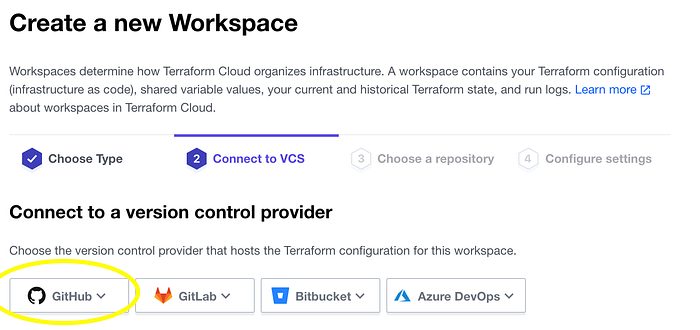
I then connected to my version control provider which for this exercise is Github (Image 4).
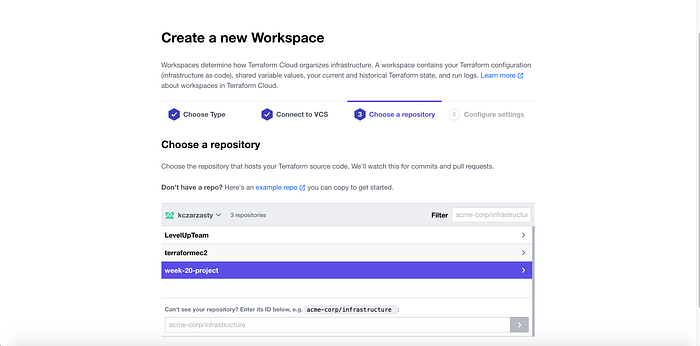
I was prompted to confirm authorization to connect Terraform Cloud to my Github, which I did. Then I chose our previously forked repo (Image 5).
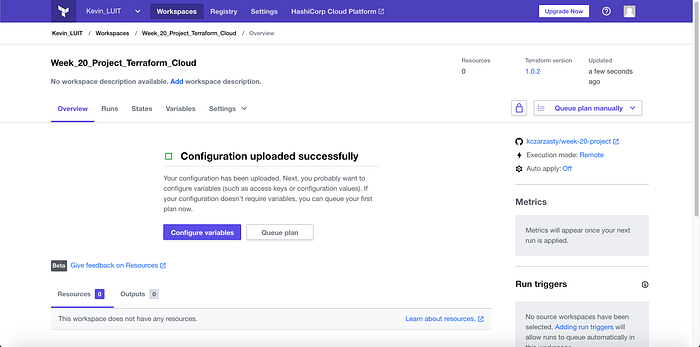
I then named the Workspace (Image 6), and then created the workspace successfully bringing me to my new workspace (Image 7).

I then clicked the purple “Configure variables” box, and then added variables in Environment Variables. The variables I added were:
- AWS Access Key, which I made sensitive (Image 8)

- AWS Secret Access Key, which I made sensitive (Image 9)

- AWS Default Region = us-east-1 (Image 10)

- Confirm Destroy (This is needed to later destroy our architecture. I set it to 1) (Image 11)

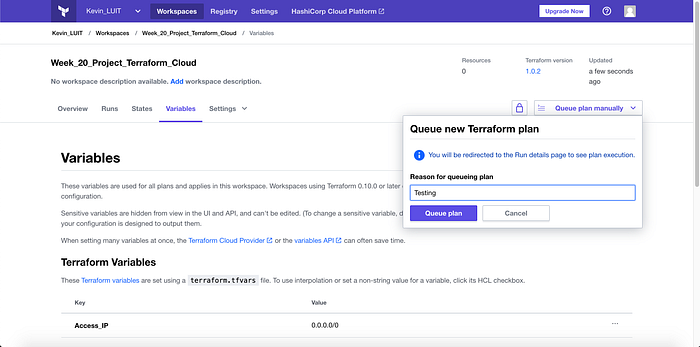
I then added the Access IP variable to the Terraform Variables as seen in Image 12. This was done rather than having a .tfvars file in the repo. I’m setting using 0.0.0.0/0 for the sake of the example. Side Note: Terraform Variables & Environment Variables aren’t synonymous.

I then manually started the pipeline by clicking “Queue plan manually” (Image 13), and I gave the reason that this was a test.
I received errors concerning my provider & I was admittedly stuck on this problem for a while (Image 14).

I explored the situation and considered a couple possible root causes. I checked that the Terraform version was up-to-date, scanned my forked files for typos, etc.
However, I had a suspicion that because “credentials” were so fundamental to the error, I would update go to AWS IAM and update new access and secret access keys. I then created a new workspace, because when you amend variables in Terraform Cloud it states that you cannot reuse them later on. I added new variables, and then re-ran the Plan.
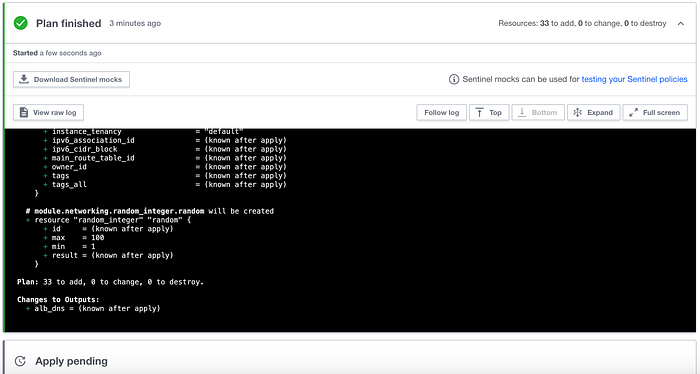
Image 15 shows that after resolving the credentials error, I was back on track and the plan had finished.
I was then ready to Apply, so I clicked “Confirm & Apply” which prompted me to make a comment before running, to which I typed “Testing.”
…But again I received an error. This time, I had reached my capacity for EIPs and VPCs in AWS (AWS offers you five & I had five in us-east-1).
After cleaning up my AWS environments and removing a few VPCs, releasing some EIPs, and clearing all dependencies, I was able to get a successful apply. You can see my resources in Images 16–18.

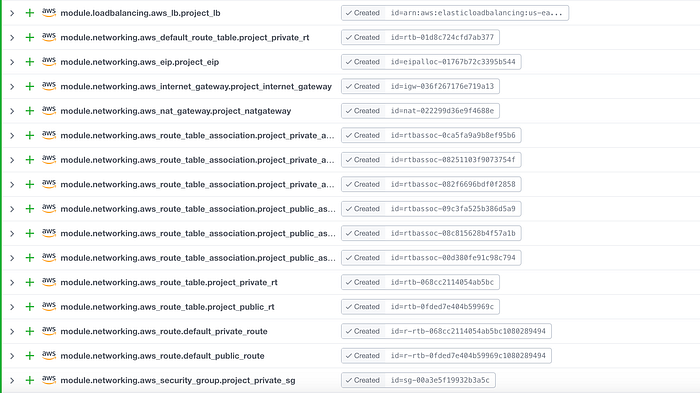
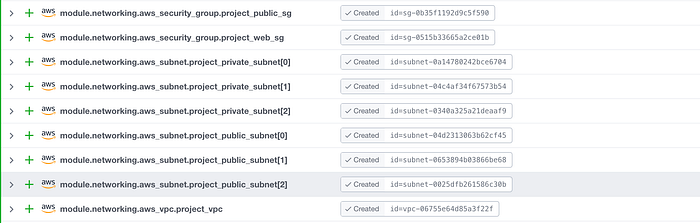
Note that there were two changes (my launch templates were updated). Also there was 1 deletion (my load balancer needed to be deleted because I had one by the same name, and in turn a new one was made).
That concludes STEP 2: Terraform Cloud
STEP 3: Testing
Now that our architecture has been built, we want to know that it also works.
Testing Application Load Balancer (ALB)
When my Terraform Apply was successful, it also gave me my output (Image 19). I copied the value so that we can test the ALB.

I then pasted the value into my web browser. I can confirm that the ALB is a successful load balancer because you can see when I refresh the page that the “Hello World” alternates web servers and the IPs aren’t the same. (Image 20 & 21).


Testing Bastion Host
In the architecture, I wanted our web servers in a private subnet, and therefore I could not directly SSH into my instances. Instead I needed to use our Bastion Host. Note I did this with a Mac — your process & tools may differ if you’re not using a Mac for this part of the exercise.
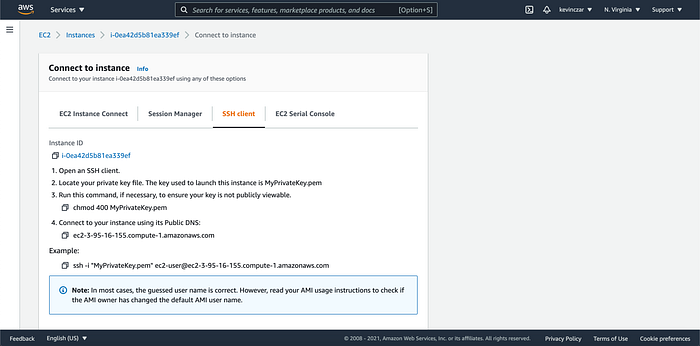
To SSH into my Bastion Host, I first went to my EC2 Dashboard and identified the Bastion Host as it has the appropriately titled security group (Image 22).

I then clicked on the Instance ID & selected the SSH Client Tab (Image 23).
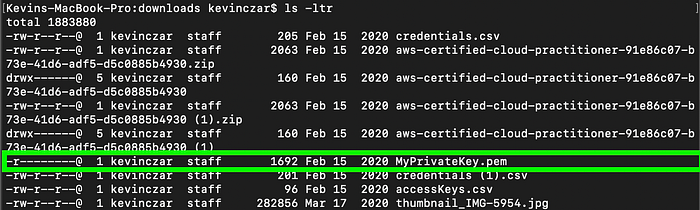
I then changed directory in Terminal to where my .pem file for MyPrivateKey was, which was in /downloads (Image 24).

I then used the command ls -ltr to see my files in /downloads, where -l longlists, -t sorts entries by modification date with newest first, and -r reverses the sorting order (Image 25).
For security and to ensure my key isn’t publicly viewable, I then changed the permissions for the file using chmod 400 MyPrivateKey.pem (Image 26) & confirmed that it was now read-only by using ls -ltr again (Image 27).


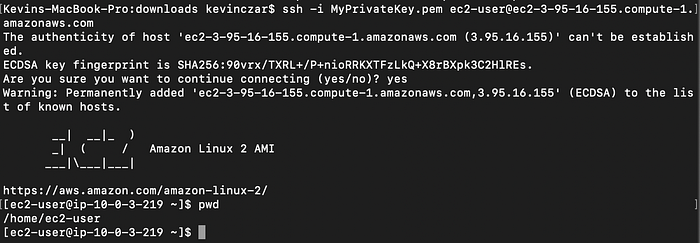
At this point the file was more secure, so I then copied the command from the SSH Client tab in AWS, removed the quotations around the file name, and ran it in my Terminal. I was asked if I wanted to continue to which I typed “yes.”
I then received the EC2 Amazon Linux 2 AMI image, and I used the command pwd to ensure I as in /home/ec2-user which I was. All of this is in Image 28.
If your connection is blocked or timing out, review these possible problems to troubleshoot. It is likely a firewall, the SSH service isn’t running on the instance, or Port 22 isn’t in the listening state. Also it could be that you incorrectly identified the bastion host and are accidentally trying to SSH into one of the other instances.
At this point I had confirmed my architecture.
Conclusion
CI/CD
In conclusion, we come full circle. We’ve forked the repo, added the right variables in Terraform Cloud, ran Terraform Plan & Apply after some troubleshooting, then confirmed the load balancer and bastion host.
Now we have the opportunity to continually integrate and develop our environment by altering the code in Github (not best practice because it can get messy), or committing new code to the repo which will automatically run in Terraform Cloud.
Destroy
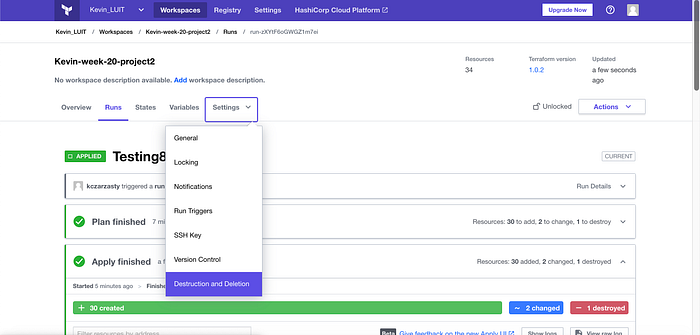
At this point I was ready to Terraform Destroy my environment, so I did so in Terraform Cloud (Image 29). I was asked to confirm the action by typing the Workspace name which I did, and Image 30 shows destruction confirmation.

Thanks for reading.
Credits: Level Up In Tech pointed me in the direction of this lab. Please get in contact with me if interested in learning from my coaches & community.